Showing posts with label Gift Ideas | Money. Show all posts

Easy Favor Gift Box Tutorial

There's something special about receiving a little gift, especially when it comes in cute packaging.  Whether you're preparing for a special occasion or simply want to surprise your friends or co-workers with a sweet treat, crafting this easy favor gift box will add a personal touch!


Easy Favor Gift Box Tutorial


Note:  I am not an Amazon affiliate, but I will provide links in case you want them.


Today, I will walk you through the easy steps to customize these cute paper boxes for any season or gift-giving opportunity.  I buy these white houses from Amazon.  The price goes up and down, but they always end up under $1.00 each.


There is probably a way to correctly fold them as-is, but I've discovered an easy little trick so the top will open and close (and you can re-use them if you want to).


Easy Favor Gift Box How-To


Step 1:  Punch out all of the pieces.


Easy Favor Gift Box How-To


Step 2:  Cut the triangle roof edges to the corner on both sides.


Easy Favor Gift Box How-To


Step 3:  Fold tabs and close the bottom of the house.


Easy Favor Gift Box How-To

Step 4:  Double-sided tape!  Again, not an affiliate, but I bought this one from Amazon and it works well.


On the side with the flap, apply a piece of double-sided tape starting near the top.  Remove the backing, fold the tabs in and tape them down.

Easy Favor Gift Box How-To


Be careful here!!!
  On the other side we want to create a little pocket for the flap to go in.  This means that we will start the double-sided tape about halfway down (NOT near the top this time).  Remove the backing, fold the tabs in and tape them down.


Easy Favor Gift Box How-To


Step 5:  At this point, you want to insert the string that comes with the boxes (and/or replace it with ribbon).  Start by threading the string through from the inside, go over the top of the box and push it through the little punched out hole on the other side.  The shoelace type ends will keep it from pulling back through.  If you use a ribbon, make sure to knot the ends.

Easy Favor Gift Box How-To

Easy Favor Gift Box How-To

Note how the flap closes at the top!


Step 5:  Fill with treats and add decorative touches.


Amazon also has lots of cute "wooden hanging ornaments".  That is your "search term".  I love gnomes, so for Christmas I made little gift boxes for my co-workers (filled with Lindt chocolate).  The tags are only painted on one-side, so you can add your own cute message to the back.

From My "Gnome" To Yours!

Easy Favor Gift Box Tutorial

Candy/Lindt Chocolates work well, but I've added packs of gum (and money, too).

Easy Favor Gift Box How-To

Ta-da!  I tied the gift tag to the ribbon with baker's twine, so the gnome could be kept/used as a one-sided ornament.

Easy Favor Gift Box Tutorial

Note:  The boxes will also hang on a Christmas tree (or from a branch outside) or wherever...

Easy Favor Gift Box Tutorial

I can think of so many ways to use these little boxes.  How about as a wedding favor with an address label on the bottom?  "From our house to yours!"

How about as an easy craft at a Senior Center?  The possibilities are endless (I've reordered four times so far)! ๐Ÿ˜ƒ 

Enjoy!  Karen

Easy Favor Gift Box Tutorial


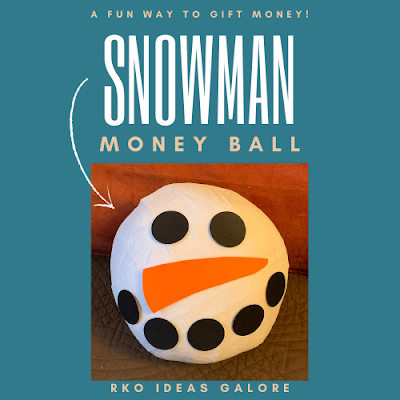
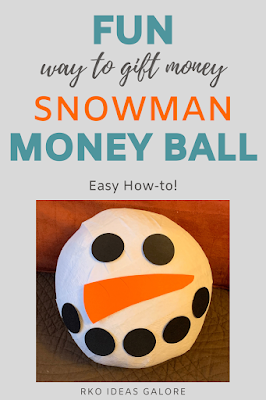
Snowman Money Ball Gift Idea

This "Snowman Money Ball" was SUPER popular last Christmas with my adult children!  I basically combined two ideas that I had seen on Pinterest:  the Saran Wrap Game mixed with a Crepe Paper Money Snowball.  As per usual, my kids mainly hoped for money from us, but this is what I did to make it more fun!


Note:  Don't think this will only work for Christmas!  The concept works especially well in the winter, but the idea could be modified to create a baseball/volleyball in the summer, etc. 


Snowman Money Ball Gift Idea


This post may contain affiliate links.  If you click on one of these links and make a purchase, I receive a small commission at no extra cost to you.  Read my full disclosure policy here.  As an Amazon Associate, I also earn from qualifying purchases at Amazon.com.


HOW TO MAKE A SNOWMAN MONEY BALL

In my case, this wasn't a game, it was an actual gift.  This means that I made three snowman heads with the same amount of money in each one.  So first off, determine how much money you want to gift.  I tend to use smaller bills, so there is more actual cash inside.

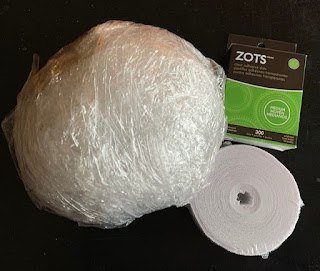
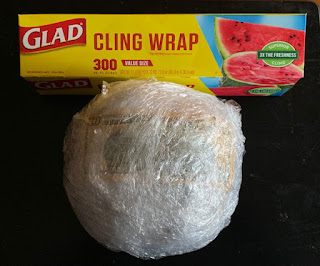
I ended up using Glad Cling Wrap and it worked well.  I used less than two boxes to make my three Snowman heads.  To keep it simple with my Glad Wrap, I basically pulled out and cut a 12 to 18 inch piece each time (i.e., no super long pieces that were wrapped and wrapped).
Snowman Money Ball Gift Idea

To begin, I wrapped the first bill around a pencil to make a tube and then I wrapped that in a piece of plastic.  I did this again, and then I wrapped the two individually wrapped bills together with another piece of plastic wrap.  Keep wrapping pieces of plastic wrap, one going this way and next one going that way trying to build an actual circle shape.  Now you are ready to add another bill.  From here on out, just keep the bills flat and cover them with the plastic wrap.  (The plastic wrap doesn't stick to the money, but it will stick to itself.)  Keep squeezing and shaping your money ball into a circle, wrapping in different directions just like if you are making a yarn ball.  Continue this process until you like the size of your money ball or you run out of money.  I ended up making mine about the size of a human head.

*********************************************

The next step is to wrap your money ball in white crepe paper.  You can buy inexpensive crepe paper at Dollar Tree/Party City, etc.  I also cut the crepe paper into pieces and wrapped this part in sections.  I used Zots (double-stick adhesive dots) to attach the strips (available at Michaels, JoAnn's, Hobby Lobby).

Snowman Money Ball Gift Idea

I cut a strip of crepe paper about two feet long.  Using a Zot, attach one end to the money ball and start wrapping to cover the plastic (again, you will be wrapping this way and that way).  Try to keep the crepe paper as flat as you can as you are wrapping.  Use another Zot to end this strip.  Cut another strip, starting in a different direction, attach another Zot and continue wrapping.  Repeat this process until the plastic wrap is completely covered.

*********************************************

To make the snowman face, I punched circles from black scrapbook paper and cut a triangular shaped nose from orange paper.  I also attached all of these pieces with Zots.  Ta-da...so cute!


HOW I GIFTED THE SNOWMAN MONEY BALL

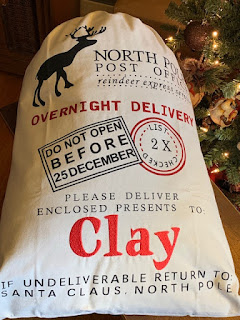
For many years, I have wanted a "Santa" sack for my kids.  I know, I know, my kids are all grown up, but I didn't have Pinterest and Etsy and all of the fun Internet stuff when they were little.  I considered trying to make one myself, BUT THEN there was a Black Friday sale for a sack that I liked.  I ordered three and they were all perfect/beautiful!  The names are stitched on.  These were far better than I could have made myself (and probably ended up being cheaper too)!

Santa Sack for Snowman Money Ball Gift Idea

I will warn you that this shop stopped taking orders for the Santa sacks shortly after Black Friday, so plan ahead.  She is taking orders again now.  Note:  Wouldn't a Santa Sack make a great baby shower gift?!?  I plan to use these every year, so I didn't let the kids take them home with them; however they really liked them and kind of wanted to.  The takeaway is that these types of bags aren't only for younger children.


We are a family of soft-blanket lovers, so I purchased an "oversized luxe throw" for each Santa Sack.  I gently wrapped the snowman head in the blanket and then stuffed the blanket in the sacks to make them look more full.  This was the very last gift.  My husband lugged them in on his back while ho-ho-ho-ing, which the kids also thought was funny.  They exclaimed over the sacks, were excited about a new snuggly blanket and had a BALL unwrapping their money from the snowman head.

This gift was definitely a winner!


Snowman Money Ball Gift Idea


Please let me know if you try it or have any questions.  ๐Ÿ’— Karen
Snowman Money Ball Gift Idea

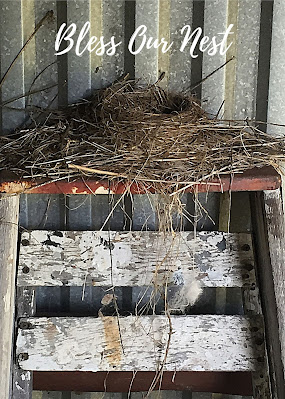
Free Photo - Bless Our Nest

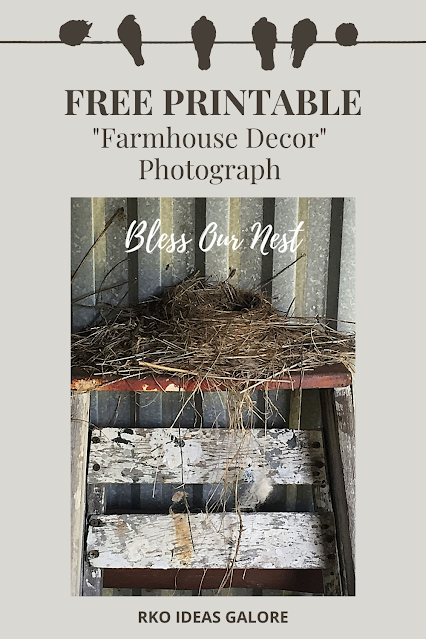
 Today I am sharing an original photograph for your "Farmhouse Decor" needs.


Bless Our Nest Free Photo

This post may contain affiliate links.  If you click on one of these links and make a purchase, I receive a small commission at no extra cost to you.  Read my full disclosure policy here.


My dad passed away unexpectedly in 2011, leaving behind a house and barn with 50+ years of collections and possessions.  It took us many years to help my mom clean and whittle everything down.  During that time, my husband came across my dad's old ladder leaning against the side of the pole barn with a beautiful nest on it.  He called us over to see it and took some pictures for me because he is taller than I am!


It was nice closure for us and I think the picture is cool, so I'd like to share it with you.  I rarely print photos anymore, but when I do I use Mpix.  They do a beautiful job, so I highly recommend them (not an affiliate).


Here is what the picture looks like in my house.  The photo is sized to be printed as a 5x7, but I have it matted in a larger wall frame.


Free Photo - Bless Our Nest


GIFT IDEAS

If you have a girlfriend who likes Farmhouse Decor, a 5x7 framed photo would be an inexpensive gift.  You could also give her a small glass bird (like this one) to go with it.


I also think this photo would make a fun wedding gift with a check attached to the back of the frame.  Wouldn't this be a nice way to help the happy couple "bless their nest" together?


Free Bless Our Nest Photo

Click here to download the picture (for personal use only).


Free photo - bless our nest


I like to think that Joanna Gaines from Fixer Upper would approve.

Enjoy!  Karen

Jingle BILLS or Silver BILLS Gift Idea

My kids are now in their twenties and CASH remains king as far as presents go.  Just handing them money is boring, so I always try to find unique ways to gift it to them.  I originally saw this idea here, but there wasn't a printable, so I made one of each to share with you!

Jingle Bills


I found these jingle bells at our local Dollar Tree in the Christmas Ornament section.  They were pre-decorated - bonus!


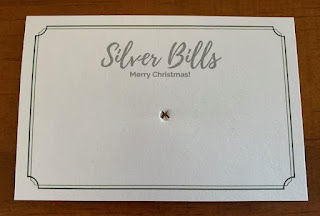
Silver Bills Gift Idea


Next, download/print the free tags.


Click here for Jingle Bills (4 tags per sheet)

Click here for Silver Bills (4 tags per sheet)

Use a paper trimmer to cut out your tags.  Try to leave an even border on all sides.  I used a ruler to measure to the approximate center and then dropped my mark slightly (because of the leaves on my bells).  My first try was too high and you couldn't read the words, so this will depend on what your actual bells look like.  My hole punch would not reach, so I used an X-acto knife to cut a little X over my center mark.  Push through with the end of a pen to make the hole bigger if necessary. 

Jingle Bills Gift Idea

I threaded the hanger through the hole and taped it to the back.

Jingle Bills Gift Idea

Fold your money in half, in half, in half, in half and push it up into the bell opening.  I did have to bend the bell edges apart a bit to make the money fit.  (Use the end of a scissor or a screwdriver.)

Here is the final product - Jingle Bills:


Silver Bills gift idea


Here is a close-up of Silver Bills:


Silver Bills gift idea

I plan to put the entire thing in a little box, wrap it up and put it under the tree!

Jingle Bills


Merry Christmas!

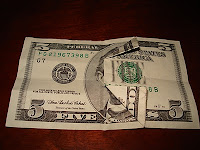
Money Origami Gift Idea

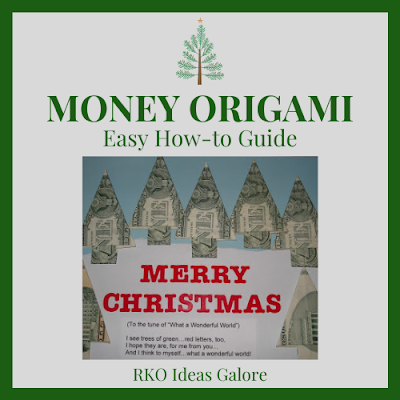
Grandma recently sent money from another state to buy Christmas presents for the kids.  I have teenagers, so cash is always king - but I wanted to think of a creative way to give it to them.  I decided to try folding it!  This is what I did...

Money origami gift idea

(Sung to the tune of "What a Wonderful World")

I see trees of green...red letters, too,
I hope they are, for me from you...
And I think to myself...what a wonderful world!


I used 8.5x11 blue cardstock as my base.  I ripped a piece of printer paper in half and attached it with double sided tape.  You can simply write "Merry Christmas" in red pen/marker, or use stickers like I did.  I typed the song lyrics on a separate piece of paper, cut them out and attached to the bottom.

Now...to make the trees(I promise - it's not too bad once you get the hang of it.)

Money Origami Gift Idea
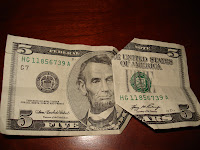
Take a bill and fold it in half lengthwise.


Money Origami Gift Idea
Unfold it and then fold it the other way.


Money Origami Gift Idea
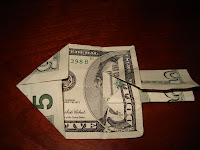
Fold about 1/2 inch of the end over.


Money Origami Gift Idea
"Open" the money, keeping the folded part intact.


Money Origami Gift Idea
Fold both edges into triangles.


Money Origami Gift Idea
The only tricky part...open the money and push/bend the triangles the other way.


Money Origami Gift Idea
Open (fold) the triangle flaps in to create the trunk.  You are kind of flattening the triangles that you just created.


Money Origami Gift Idea
For the top of the tree, fold both edges to the center line.


Money Origami Gift Idea
Fold both edges to the center line again (like a paper airplane fold).  Note:  In the example, this step has only been completed on one side.


Money Origami Gift Idea
Flip it over to see your tree!  I folded the trunk in half again before I used double sided tape to attach it to the cardstock.


Cute, right?  Try folding a dollar bill and let me know if my directions are clear!


Easy Money Origami Gift Idea

Enjoy!  Karen

Easy Money Origami Gift Idea
© RKO Ideas Galore. Powered by Blogger.
Back to Top