A couple of years ago, my husband framed a chalkboard for me. While it was cute, I wasn't very good at "fancy writing" and when I erased my chalk marker, it left a ghost image. I was disappointed and didn't use it much, except to write the occasional Happy Birthday on it!
Fast forward to my mom buying a cute chalkboard this year and being in the same boat. I knew there had to be an easier way, both to create and erase images - and I do believe I've found a solution for both problems!
Tip #1
Every chalkboard is different, but this is what finally worked for me to erase my chalkboard marker: Mr. Clean MagicEraser
I bought the six-pack and shared one with my mom. Use the rest to gift to other chalkboard lovers or use them to clean your tub/shower - they work great!
Cut your MagicEraser in half. Wet it, wring it out and start cleaning your chalkboard. Because I used a chalk marker, I had to rinse and repeat this step about three times. (Note: You can still see my previous ghost images behind my Easter decoration because I traced this before my new Magic Erasers arrived from Amazon.)
My board came clean with just the Magic Eraser and water; however if that doesn't work for you, try using it with white vinegar or water with dish soap (Dawn, etc.). Dry with a paper towel. Ta-da, a clean slate! This is much improved for my particular chalkboard...
Tip #2
How DO people create those beautiful chalkboards that you see on Pinterest?!? Is everyone out there really great at freehand lettering, spacing, and creating different fonts? No! There is a secret weapon called "transfer paper"!
This product comes in multiple colors for different purposes, but I used the Saral white version for my chalkboard.
I will share the images that I used for "Spring has Sprung"; however it is easy to make them yourself. I love Canva for designing all sorts of things (labels, pins, posters, etc.) The basic version is free, free, free (which is what I use). For this one, I created a poster in Canva and then pasted the image into Microsoft Excel, so I could easily stretch it into multiple pages.
Option: If you just want to make this into a regular "printable", download the image and insert it into whatever Word Processing program you use. Stretch/shrink it to fit your frame and print it out in color!
Chalkboard How-to
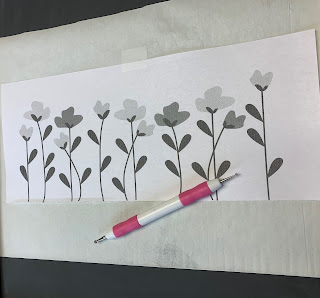
Once you have your printout, decide where you want each piece of your design...trying to stay approximately centered both vertically and horizontally. Sometimes it is hard to tell which side is up on the transfer paper, but there is a "chalky side" which should always face down.
My board is tall, so I decided to move my flowers up and then freehand extend the stems to make them longer. It worked! You could use a pencil to trace, but I prefer using a tracing stylus. (I found this cute pink one at Dollar Tree.) This way I can keep my designs and reuse them year after year. I typically tape my design to the transfer paper. (My mom also tapes her transfer paper to the chalkboard.)
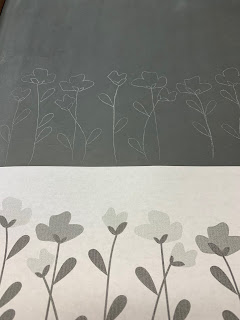
Start tracing and then lift up your paper to make sure you have the correct side facing down. You should see a light image on your chalkboard! Pay attention! It is easy to forget where you've traced (especially if you are chatting with your mom). Take a look at the entire image before you remove your paper completely!
I use a white chalk marker to fill everything in. Up close, mine looks a little gloppy, but from a distance it looks great! If you mess up, use a slightly damp Q-tip to make corrections. The chalk markers are wet, so be careful not to drag your hand across areas that you've already filled in. Nothing is perfect, but we are going for progress, not perfection, right?!?
Remember - the Saral is reusable! Don't throw it away after every trace, you can get many more uses out of the same piece.
My mom and I are having fun with this new method. If you are interested, I will keep sharing the simple designs that I make for us. Let me know if you try it or have any questions!
💖 Karen


